¶ Installing the Proxmox Service
- Download the latest Proxmox Service ZIP: https://github.com/WemXPro/service-proxmox/archive/refs/heads/main.zip
- Using FTP, locate folder /var/www/wemx/app/Services and create a new folder called Proxmox
- Open the ZIP file downloaded earlier, then open service-proxmox-main folder
- Upload all files in this folder to the Proxmox folder in /var/www/wemx/app/Services/Proxmox
- Update the Proxmox dependencies with php artisan module:update Proxmox
¶ Configure Proxmox service
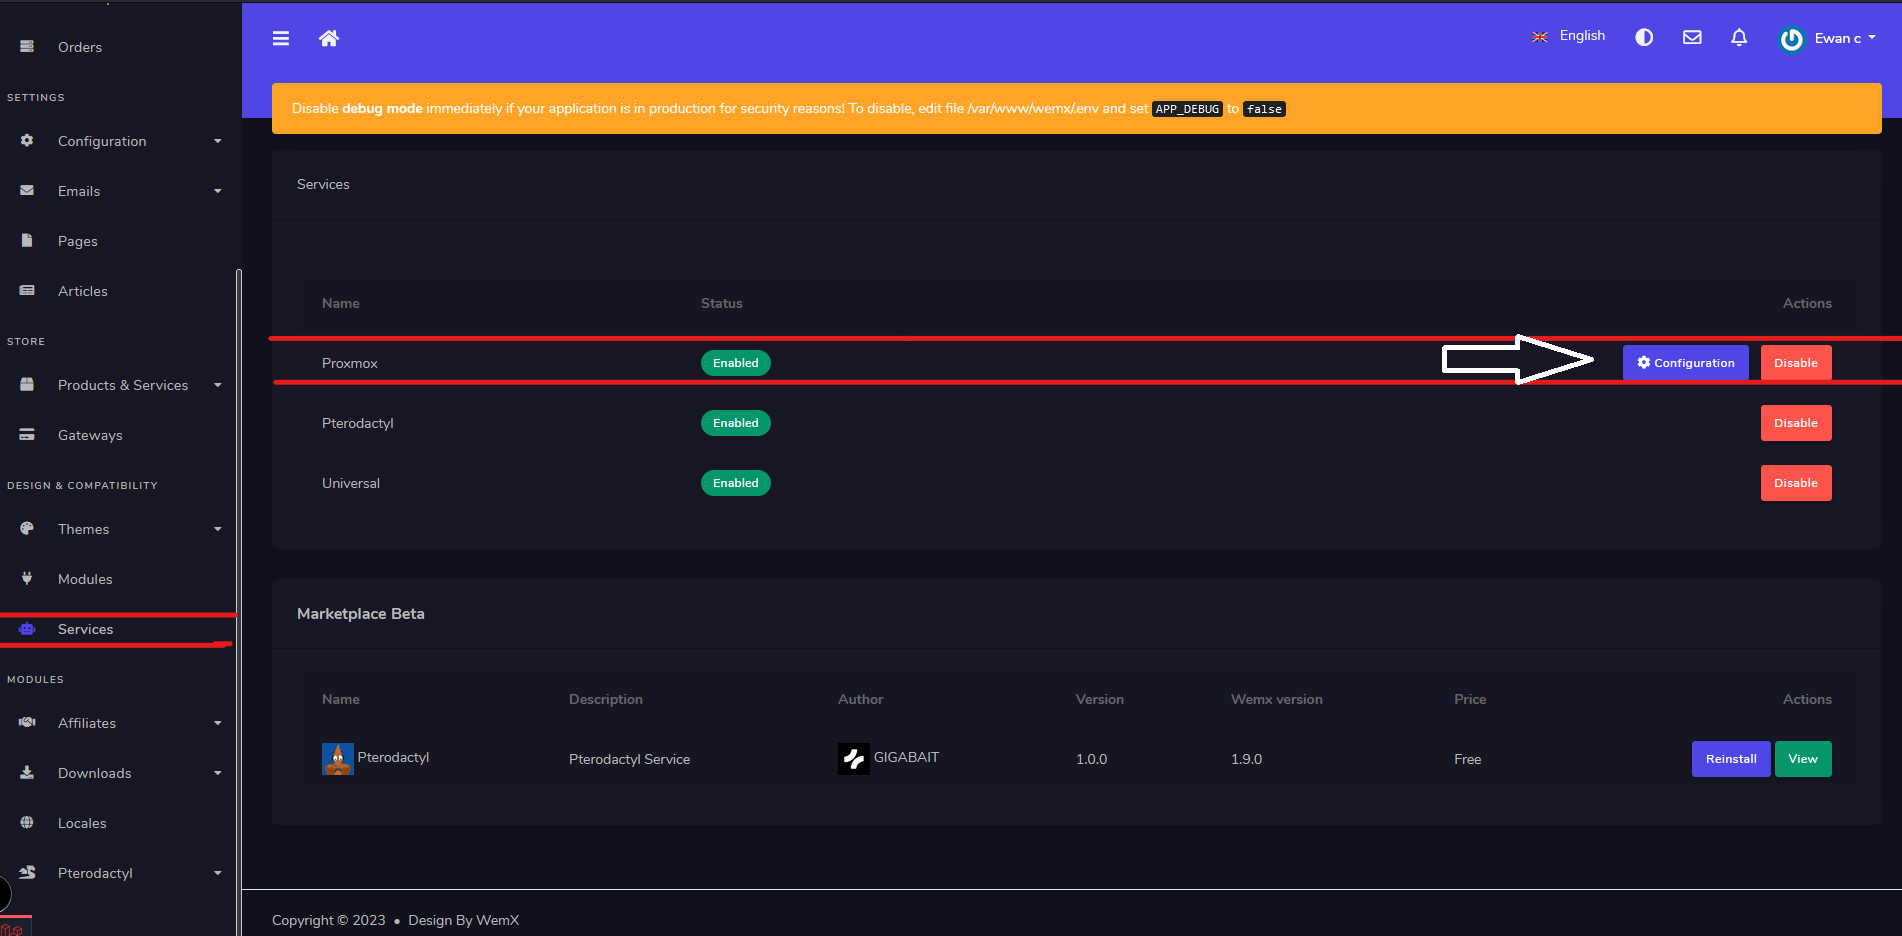
After installing Proxmox, head over to Admin -> Services -> Enable Proxmox

After enabling Proxmox, click on Configuration

- Hostname: Enter the URL to your Proxmox panel including http:// or https:// and port
- Token ID: Enter token ID from API token for Proxmox
- Token Secret: Enter token secret from API token for Proxmox
¶ Creating API token on Proxmox
In order to setup the Proxmox service correctly on WemX, you need to create an API token on your Proxmox panel.
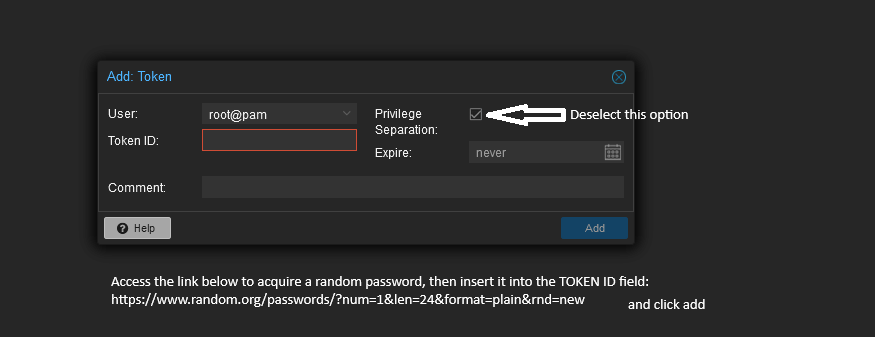
- Open your Proxmox panel -> Datacenter -> API Tokens and click "Add" API Token


- Set "wemx" as token ID and make sure the "Privilege Separation" option is NOT selected

- After you have created the token successfully, Proxmox shows the details for the API token. Make sure to copy them right away as they don't show up again.

- Open WemX and locate the configuration for Proxmox, fill in the token ID and token secret and the Proxmox URL. Save the configuration and click on "Test connection" to verify everything is working.

Here you can find a guide on manually adding VMs to orders in your Proxmox service: Proxmox Manual VM Guide